Deploying Apps to Multiple K8S Clusters using ArgoCD
Preface
One of the biggest challenges in deploying Kubernetes-based applications is monitoring file changes. This is even more pronounced when we have multiple clusters on different sites, making us sometimes lose track of which version is on which site.
Therefore, we need some kind of single source of truth that becomes the single source of manifests that are deployed to clusters. This can certainly simplify the deployment process as well, especially if the deployment process itself can be done automatically.
ArgoCD is one of the solutions that is present to answer that concern.
Prerequisite
Before doing the application deployment process to the Cluster via ArgoCD, there are several things that need to be prepared:
- A complete Kubernetes resource manifest, including Cluster-specific resources (such as Route or DeploymentConfig for Openshift Container Platform), CRD, and Kustomize if you want different values depending on the environment;
- Container images that are ready-made and uploaded and can be downloaded from a Container Registry;
- Git and access to the Git repository where we put the Kubernetes manifest;
- Write access to the ArgoCD.
Procedure
Setting up the Manifest File
Prepare the required Kubernetes manifest files in the form of a Customize frame. Generally, the minimum required for an application to be accessible are deployment and service.
INFO
In OCP sometimes some deployments cannot run because of
securityContext, for such case most likely have to addserviceAccountandroleBindingconfiguration as well.
For example, the directory file order is something like this:
├── base
│ ├── grafana-clusterrolebinding.yaml
│ ├── grafana-configmap.yaml
│ ├── grafana-deployment.yaml
│ ├── grafana-route.yaml
│ ├── grafana-secret.yaml
│ ├── grafana-serviceaccount.yaml
│ ├── grafana-service.yaml
│ └── customization.yaml
├── overlays
│ ├── development
│ ├── grafana-namespace.yaml
│ │ ├── grafana-route-patch.yaml
│ │ └── customization.yaml
│ ├── production
│ │ ├── grafana-hpa.yaml
│ │ ├── grafana-namespace.yaml
│ │ ├── grafana-route-patch.yaml
│ └── customization.yaml
│ └── staging
│ ├── grafana-hpa.yaml
│ ├── grafana-namespace.yaml
│ ├── grafana-route-patch.yaml
│ └── customization.yaml
└── README.md
Explanation per directory:
- base is the directory for the base manifest template that will be applied to all Clusters. If the configuration for all Clusters is the same, the file can simply be placed in the
base/directory; - overlays is a directory for new/replacement files/values that are different for each environment. We can divide it into several environments. For example, above we split the environment into 3: development, staging, and production. For example, if we want to create a different Route or HPA for each Cluster.
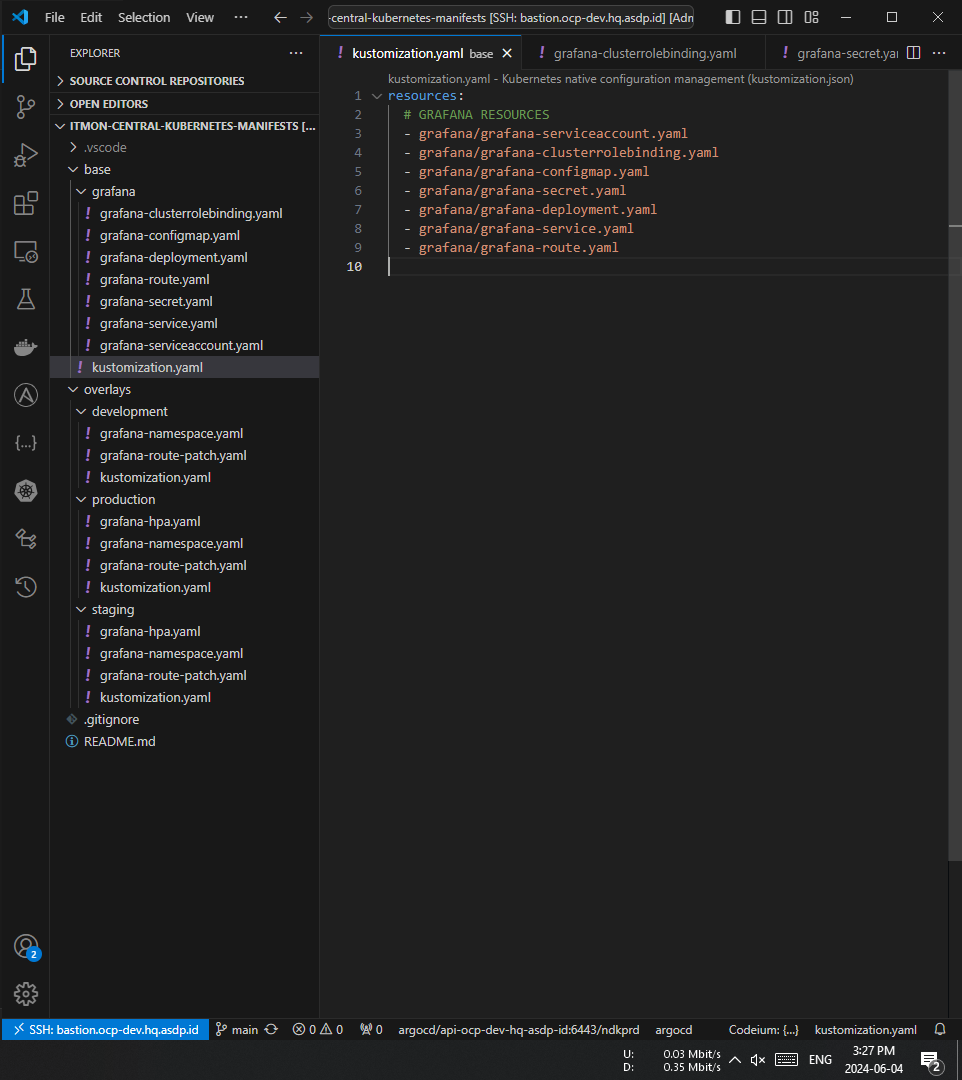
For base/kustomization.yaml itself is a file that contains files that must be run. Inside base/, the example file is more or less like this:
# Deploying Apps to Multiple K8S Clusters using ArgoCD

resources:
  # grafana RESOURCES
  - grafana-serviceaccount.yaml
  - grafana-clusterrolebinding.yaml
  - grafana-configmap.yaml
  - grafana-secret.yaml
  - grafana-deployment.yaml
  - grafana-service.yaml
  - grafana-route.yaml
INFO
As an important note, the order of files in the
resourcessection is the order of files to be run, so for files that are dependencies (serviceAccount,roleBinding,secret,persistentVolume,persistentVolumeClaim) are put on top first beforedeployment.
While ./overlays/<environment>/customization.yaml itself defines a new file specific to that environment. For example:
# ./overlays/development/customization.yaml

namespace: itmon-central-dev
resources:
  - ../../base
  - grafana-namespace.yaml
commonLabels:
  isPartOf: itmon-central
  environment: development
namePrefix: itmon-central-dev-
patchesStrategicMerge:
  - grafana-route-patch.yaml
The description itself is more or less as follows:
namespaceis the namespace that will be used for all files;resourcesabove means it merges all files in./base/with the fileoverlays/development/grafana-namespaces.yaml;commonLabelsabove is the label that all labels will be given;namePrefixyou can use if you want to modify the names of resources;patchesStrategicMergecan be used if you want to change only certain values.
To test whether our manifest configuration is perfect, we can test using the following command:
oc apply -k overlays/<environment>Example:
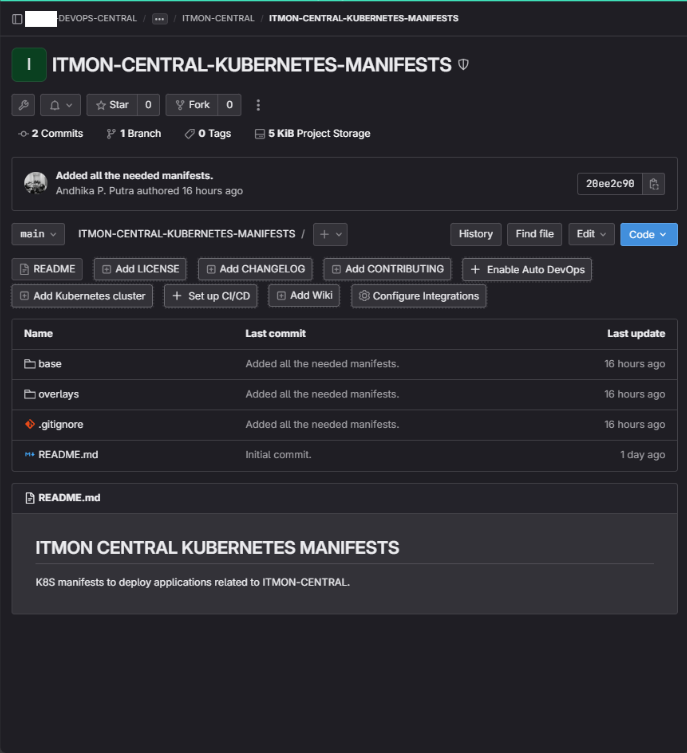
oc apply -k overlays/developmentPush Deployment to Repository Manifests
If you are sure the configuration is perfect (can be tested by deleting the namespace and then trying oc apply -k again), we just need to put the manifest collection into one repo.
Connect Repository to ArgoCD
Add the repository we created in the Settings -> Repositories menu. Add a new Repo using the +CONNECT REPO button above.
In general, the values that need to be filled in for the Repository:
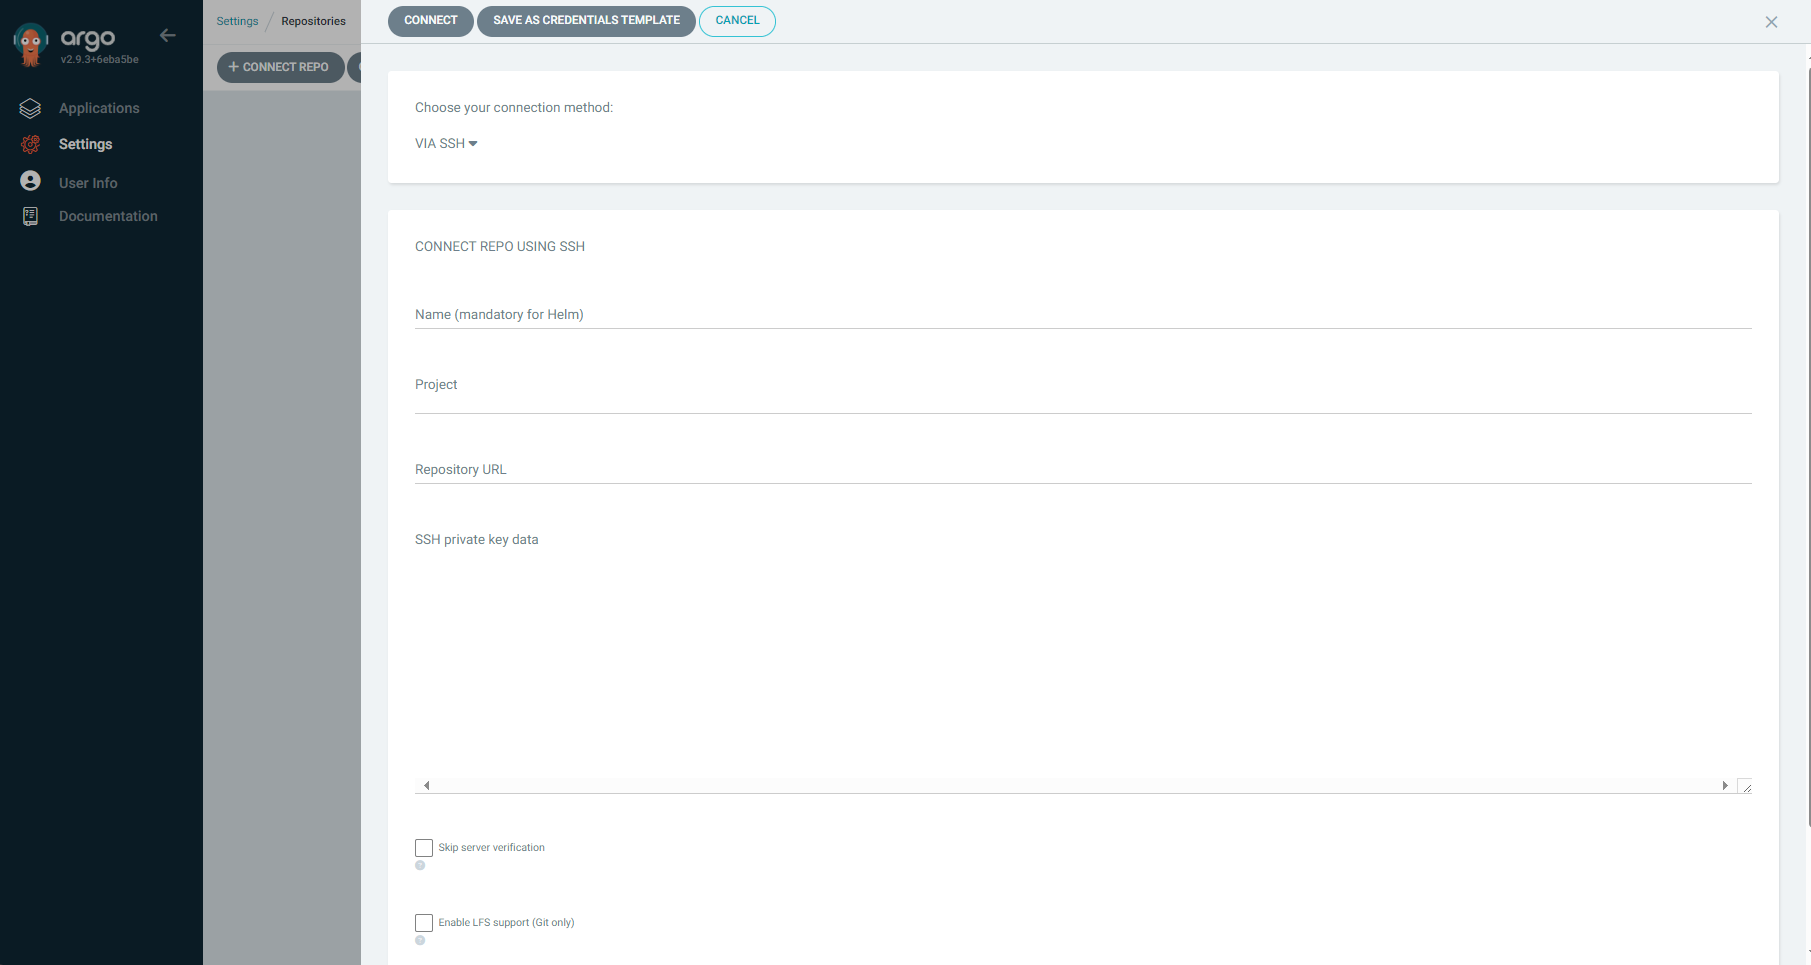
- Connection method can be SSH and HTTPS (or Google Cloud and Github), if you have never setup SSH git before, you should choose HTTPS;
- Enter the name of the ArgoCD Project (choose the default unless the project is already prepared);
- Enter the repository link (the one behind .git);
- If the repo is internal, enter Username and Password/PAT.
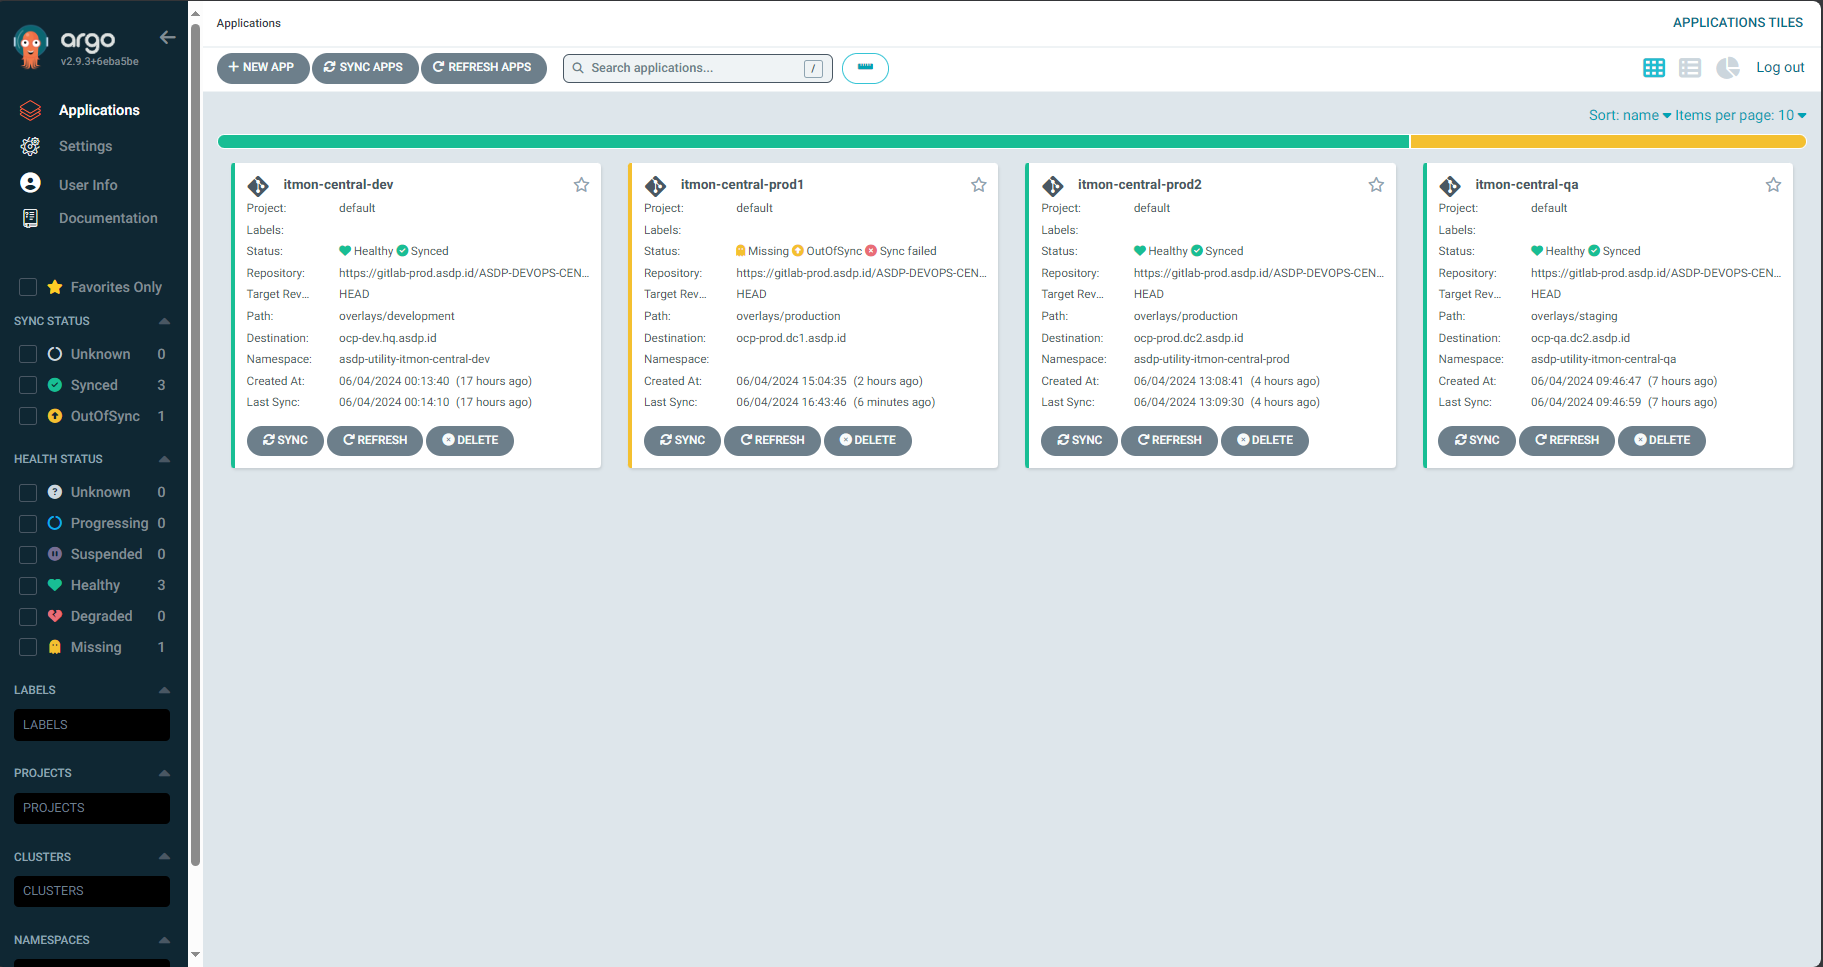
If so, just add a new application in the Applications menu then select the + NEW APP button above. Fill in the data as needed, then select the Cluster where we want to deploy the application.
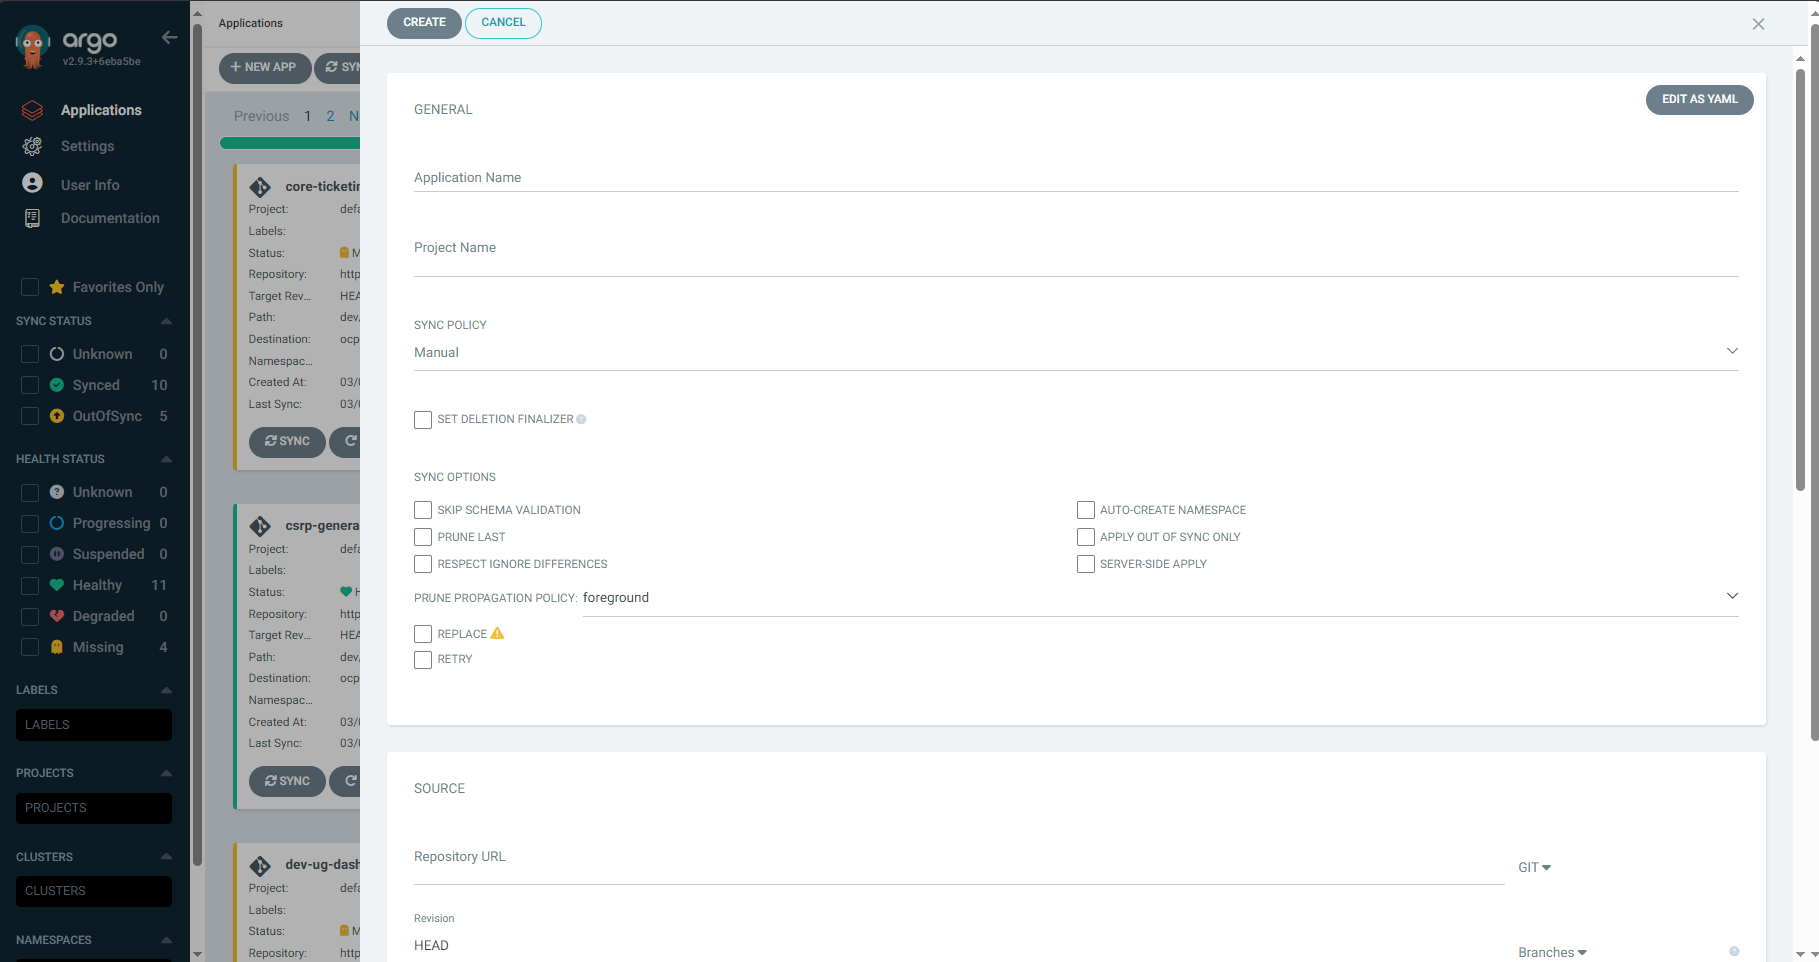
Some values to consider:
- Application name: ArgoCD App name, can be differentiated per environment (Example: itmon-central-dev, itmon-central-qa);
- Project name: ArgoCD Project name, choose default unless the Project is already set up;
- Sync Policy: can be manual or Automatic. If Automatic, you can enable the Prune Resource option so that ArgoCD automatically removes deleted resources from Git, and Self Heal if you want changes that occur in the Cluster to be forced to revert to resources defined in Git.
If we want to deploy again to another Cluster, just create a new application again and then select another Cluster.
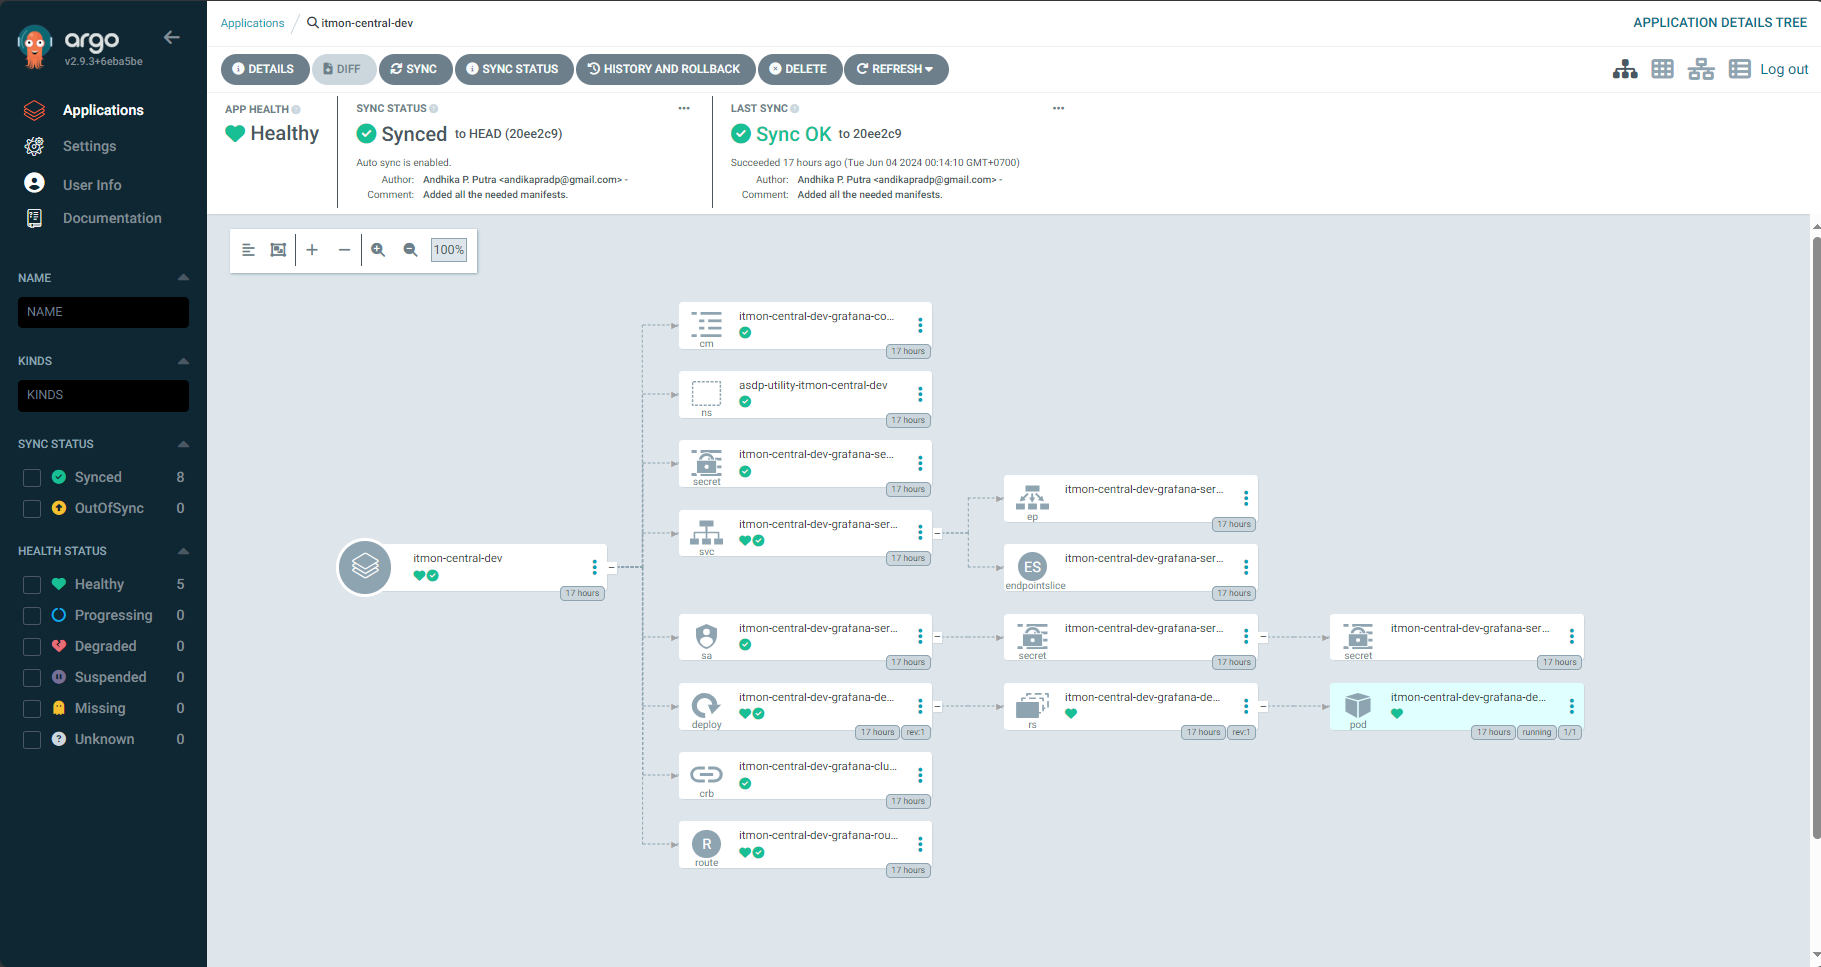
Conclusion
If so, then we should be able to monitor the deployment process by opening the application box that you just deployed.